Annotate For Phrase Grounding
Create phrase grounding annotations by linking text descriptions to bounding boxes in your images.
Phrase grounding annotations teach your VLM to understand the connection between text descriptions and specific objects in images. Create comprehensive visual grounding datasets using Datature's annotation tools.
Prerequisites
- A dataset with uploaded images
- Understanding of what objects you want to detect and describe
- Basic familiarity with phrase grounding concepts
Create a dataset if you don't have one yet.
What is phrase grounding?Phrase grounding connects natural language descriptions to specific regions in an image. For example, linking the phrase "large black FPGA chip in the center" to its bounding box location. This enables models to understand and locate objects based on text descriptions.
Open the annotator
-
Navigate to your dataset and click the Annotator tab
-
The annotator will open with empty views
-
Click on an image thumbnail at the bottom to load it
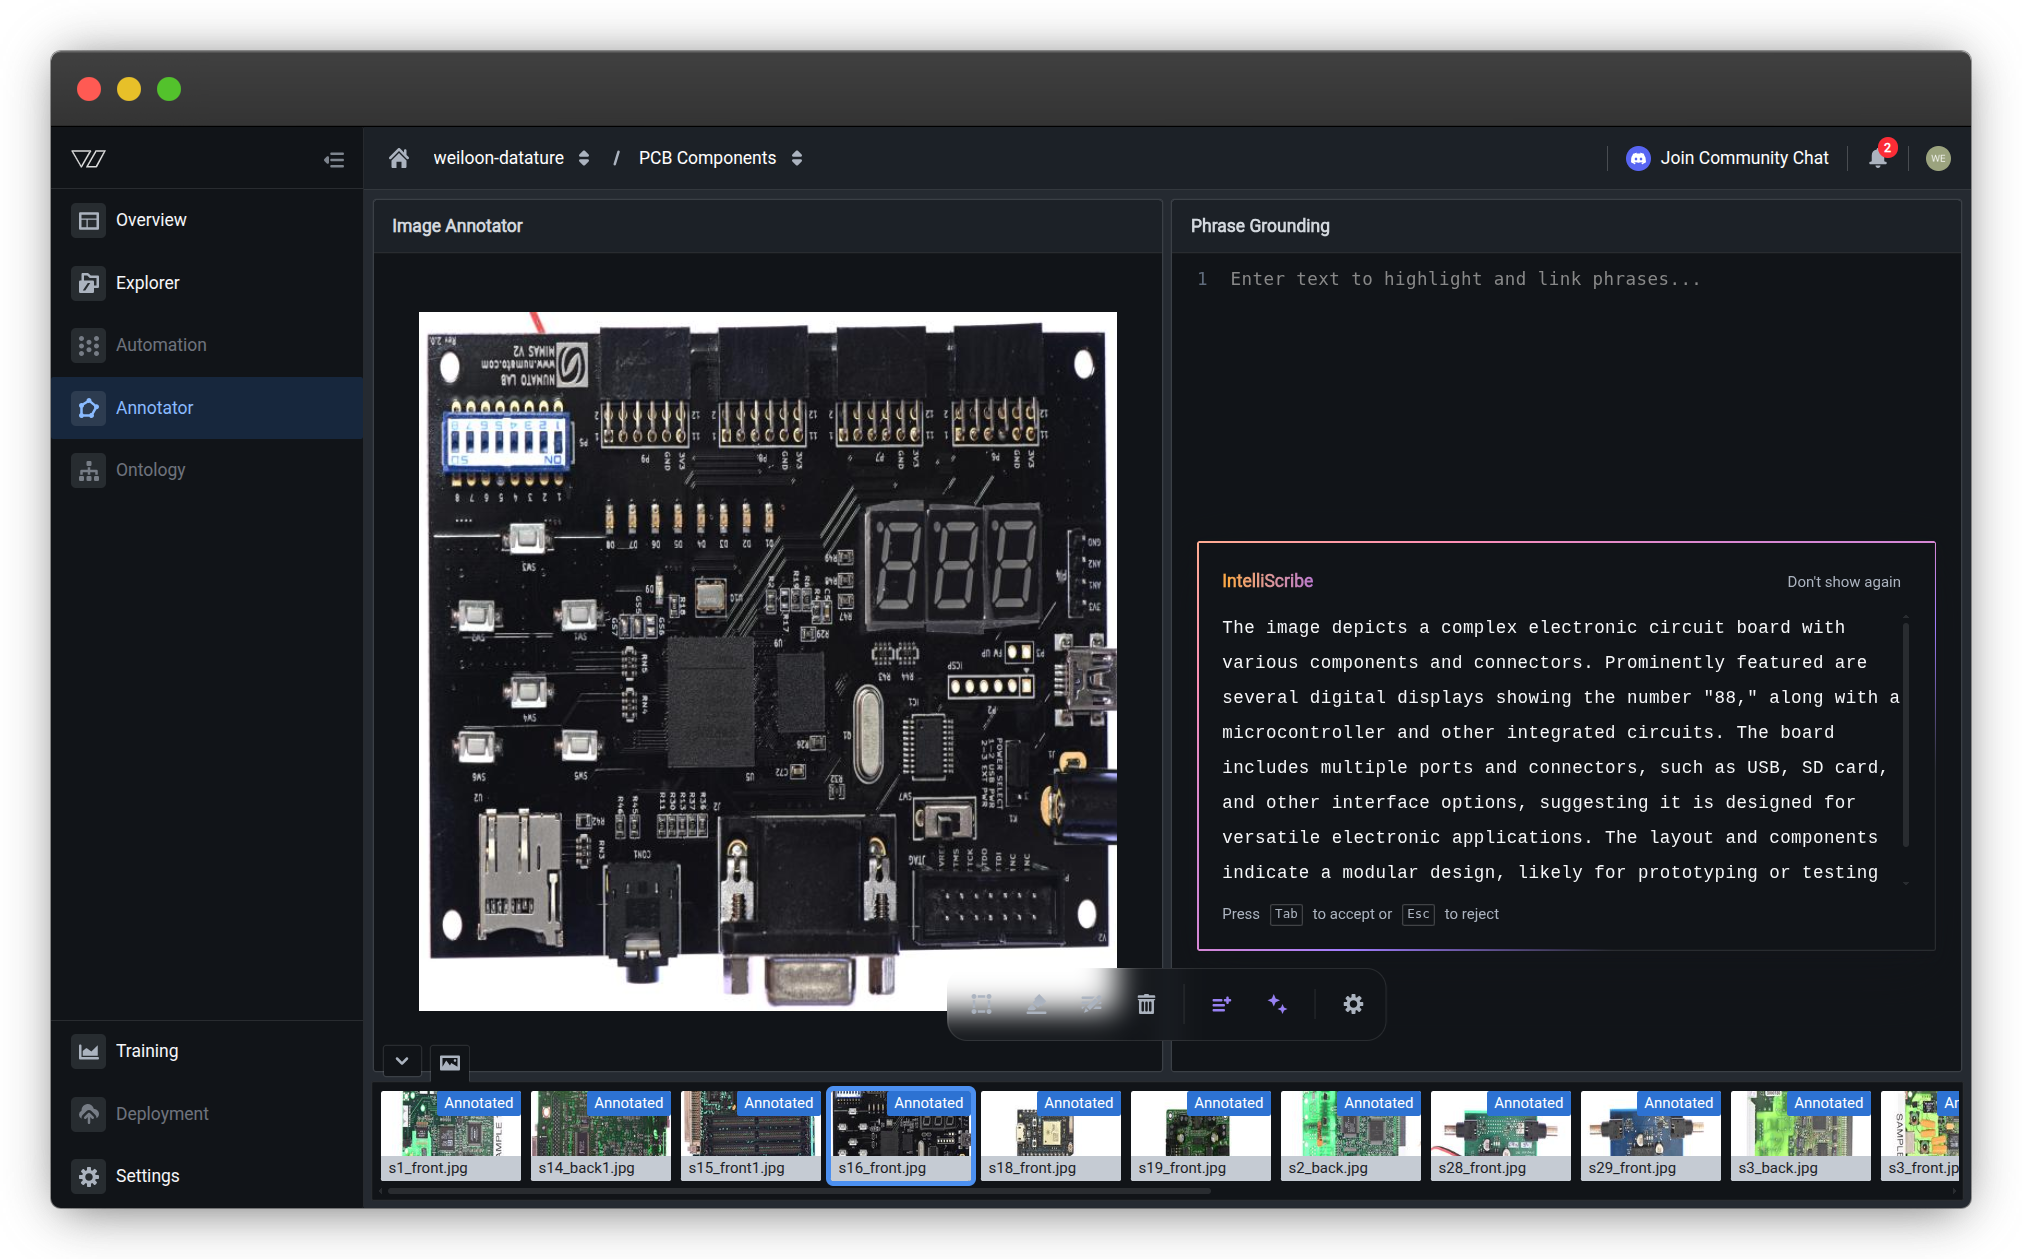
Annotator interfaceThe phrase grounding annotator has three main areas:
- Left side — Image Annotator with drawing tools (displays your selected image)
- Right side — Phrase Grounding panel with caption and IntelliScribe options
- Bottom — Image thumbnail navigation strip (click any thumbnail to load that image)
The IntelliScribe prompt helps with AI-assisted annotation but can be dismissed if you prefer manual annotation.
Create phrase grounding annotations
Phrase grounding annotations link text descriptions (phrases) to visual regions (bounding boxes). Each annotation has two components:
- Caption — A text description of what's in the image
- Linked bounding boxes — Boxes drawn around objects, connected to specific phrases in the caption
Understand the interface
Before annotating, familiarize yourself with the available tools:
| Tool | Shortcut | Purpose |
|---|---|---|
| Rectangle | R | Draw bounding boxes around objects |
| Text | T | Write or edit the image caption |
| Highlight | H | Highlight phrases in the caption to link to boxes |
| Delete | D | Remove bounding boxes or phrase links |
| IntelliScribe Caption | C | AI-generate a caption based on the image |
| IntelliScribe Phrases | P | AI-highlight phrases for unlinked boxes |
| Esc | Esc | Exit current tool mode |
Learn about AI-assisted tools →
Write or generate captions
Every phrase grounding annotation starts with a caption that describes the image content.
Option 1: Write caption manually
-
Press T or click the Text tool
-
Type your caption in the Phrase Grounding panel on the right
-
Describe the main objects, their attributes, and relationships
Example captions:
- "A black FPGA development board featuring a large black FPGA chip in the center, a row of gold pin headers along the top, a 7-segment LED display on the right showing digits"
- "Two red apples and three green apples on a wooden table"
- "A person wearing a blue safety helmet standing next to industrial machinery"
Option 2: Generate caption with AI
-
Press C or click the IntelliScribe Caption button
-
Review the AI-generated caption in the Phrase Grounding panel
-
Edit as needed using the Text tool (press T)
Learn more about IntelliScribe →
Caption writing best practices
- Be descriptive — Include colors, sizes, positions, and other distinguishing features
- Be specific — Use precise terms for objects ("FPGA chip" vs. "chip")
- Include spatial relationships — Mention locations ("on the left", "in the center", "at the top")
- Keep it natural — Write complete sentences as you would describe the image to someone
See Annotation best practices for detailed guidelines.
Link phrases to bounding boxes
After writing a caption, link specific phrases to bounding boxes around the objects they describe. There are two main workflows:
Workflow 1: Caption first, then boxes
This workflow is ideal when you know what you want to describe before drawing boxes.
[GIF PLACEHOLDER: Type caption → highlight phrase → draw linked bounding box]
-
Write your caption using the Text tool (press T)
-
Highlight a phrase:
- Press H or click the Highlight tool
- Click and drag to select a phrase in your caption
- The phrase becomes highlighted with a colored background
-
Draw a bounding box:
- You'll be automatically prompted to draw a box
- Press R or click the Rectangle tool
- Click and drag on the image to draw a box around the object
- The box will be linked to your highlighted phrase with a matching color
-
Repeat for other phrases:
- Press H to highlight another phrase
- Draw its corresponding bounding box
- Continue until all key objects are annotated
Tip: Each phrase-box pair gets a unique color to help you quickly see which phrases link to which boxes.
Highlighted phrases cannot overlapEach highlighted phrase must be a distinct, non-overlapping text interval in your caption. You cannot highlight overlapping text regions. Plan your caption structure to ensure phrases are clearly separated.
Workflow 2: Boxes first, then link phrases
This workflow is ideal when you want to identify objects visually before describing them.
[GIF PLACEHOLDER: Draw bounding box → link by highlighting phrase in caption]
-
Draw a bounding box:
- Press R or click the Rectangle tool
- Click and drag on the image to draw a box around an object
- The box appears unlinked (no associated phrase yet)
-
Link to a phrase:
- You'll be automatically prompted to select a phrase
- Press H or click the Highlight tool
- Highlight the phrase in your caption that describes this object
- The box and phrase become linked with a matching color
-
Repeat for other objects:
- Press R to draw another box
- Highlight its corresponding phrase
- Continue until all key objects are annotated
Alternative: Use IntelliScribe to auto-link phrases
If you have unlinked boxes:
- Press P or click IntelliScribe Phrases
- The AI will automatically highlight phrases in your caption that match your boxes
- Review and adjust the highlighted phrases as needed
Prerequisites: You must have at least one bounding box drawn and a caption written.

Edit or delete annotations
You can modify or remove annotations at any time. Choose the appropriate action based on what you need to change.
Edit a caption
-
Press T or click the Text tool
-
Click in the caption text area
-
Make your changes
-
Changes save automatically as you type
Use when: Fixing typos, adding details, rephrasing descriptions
Edit a bounding box
-
Click on the bounding box you want to adjust
-
Drag the box to reposition it
-
Drag the corner or edge handles to resize it
-
The linked phrase remains connected
Use when: Adjusting box position or size while keeping the same phrase link
Delete a bounding box
-
Press D or click the Delete tool
-
Click on the bounding box you want to remove
-
The box and its phrase link are deleted (the phrase text remains in the caption)
Use when: Removing incorrect boxes, duplicate annotations, or boxes on wrong objects
Deletions cannot be undone. Make sure you want to remove the annotation before clicking.
Delete a phrase link
-
Press D or click the Delete tool
-
Click on the highlighted phrase in the caption
-
The highlight and box link are removed (the box and caption text remain)
Use when: Unlinking a phrase to connect it to a different box, or removing phrase highlights while keeping boxes
Deletions cannot be undone. You can re-highlight the phrase to link it again.
Quick reference:
- Edit — Adjust positions, fix typos, or rephrase descriptions
- Delete — Remove incorrect boxes, unlink phrases, or start over
Save your work
Your annotations save automatically when you:
- Draw or edit bounding boxes
- Write or edit captions
- Highlight phrases
- Delete annotations
- Navigate to another image (press E or Q)
Auto-save enabledAll changes save automatically. You don't need to manually save your work. Use keyboard shortcuts to navigate efficiently through images.
Navigate between images
Efficient navigation helps you annotate large datasets quickly. Use keyboard shortcuts or mouse controls to move between images.
Move to the next image
After annotating an image, move to the next one:
Using keyboard (recommended for speed):
- Press E → Next image
- Press Q → Previous image
Using mouse:
- Click the next image thumbnail in the bottom navigation strip
- Click on any specific image thumbnail to jump directly to it
The bottom thumbnail strip shows all images in your dataset with "Annotated" badges indicating which images have phrase grounding annotations.
Pro tip: Use keyboard shortcuts to maintain annotation speed without switching between keyboard and mouse.
Keyboard shortcuts
Speed up annotation with keyboard shortcuts. Master these to significantly improve your annotation efficiency.
Essential shortcuts
| Shortcut | Action | Use case |
|---|---|---|
| R | Rectangle tool | Draw bounding boxes around objects |
| T | Text tool | Write or edit the image caption |
| H | Highlight tool | Highlight phrases to link with boxes |
| D | Delete tool | Remove boxes or phrase links |
| C | IntelliScribe Caption | AI-generate a caption |
| P | IntelliScribe Phrases | AI-highlight phrases for unlinked boxes |
| E | Next image | Move to the next image after annotating |
| Q | Previous image | Go back to review previous annotations |
| Esc | Exit tool mode | Return to default selection mode |
| ? | Show all shortcuts | View complete keyboard shortcut reference |
Workflow optimization
Choose a workflow pattern that suits your annotation style. All workflows keep your hands on the keyboard for maximum speed.
Caption-first workflow
Efficient annotation pattern:
- Press T → Type caption
- Press H → Highlight phrase → Press R → Draw box
- Repeat step 2 for other phrases
- Press E to move to next image
Best for: Beginners, systematic annotation, descriptive-heavy tasks
Box-first workflow
Alternative pattern:
- Press R → Draw box → Press H → Highlight phrase
- Repeat for other objects
- Press E to move to next image
Best for: Experienced annotators, visual identification, speed
AI-assisted workflow
Quick AI-assisted pattern:
- Press C → Review generated caption → Press T to edit if needed
- Press R → Draw boxes around objects
- Press P → Review AI-highlighted phrases → Adjust if needed
- Press E to move to next image
Best for: Large datasets, common objects, rapid annotation
See Annotation best practices for more efficiency tips.
Pro tipPress ? in the annotator to see the complete list of keyboard shortcuts. Press Esc to exit any tool mode and return to default selection.
Annotation guidelines
Creating effective phrase grounding annotations requires attention to both visual accuracy and text quality. Follow these guidelines for consistent, high-quality annotations.
Caption writing guidelines
Be descriptive and specific:
✅ Good:
- "A large black FPGA chip in the center, several white tactile push buttons on the left side, a blue VGA connector at the bottom"
- "Two red apples in a wooden bowl on the left, three green apples scattered on the right side of the table"
- "A worker wearing a yellow safety helmet and orange vest standing next to a forklift"
❌ Too vague:
- "Some electronics"
- "Fruits on a table"
- "A person at work"
Include spatial information:
Use positional terms to help the model understand object locations:
- Position: "in the center", "on the left edge", "at the top", "near the bottom"
- Relative position: "above the", "next to", "between the", "surrounding"
- Direction: "facing left", "pointing upward", "horizontal", "vertical"
Use consistent terminology:
- Choose specific object names and use them consistently across your dataset
- Define a vocabulary for your domain (e.g., "FPGA chip" vs. "integrated circuit")
- Standardize color descriptions (e.g., "blue" not "light blue" or "navy")
- Use the same format for similar objects
Bounding box guidelines
Draw tight boxes:
- Include the entire object but minimize empty space
- Align box edges with object boundaries
- For irregular objects, include the smallest rectangle that contains the whole object
Be consistent:
- Draw boxes at the same level of detail across your dataset
- If you include shadows or reflections for one object, do so for all similar objects
- Maintain consistent box tightness (not too tight on some, loose on others)
Handle overlapping objects:
- Draw separate boxes for each object, even if they overlap
- Ensure each box clearly defines one object's boundaries
- Link each box to its own phrase in the caption
Handle partially visible objects:
- Draw boxes around visible portions of partially occluded objects
- Include a phrase like "partially visible" in the caption if relevant
- Be consistent about whether you annotate partially visible objects
Phrase linking guidelines
Phrases must not overlap:
Highlighted phrases must be distinct, non-overlapping text intervals in your caption. You cannot highlight the same words multiple times or create overlapping highlights.
✅ Good:
- "A large black FPGA chip in the center" and "several white tactile buttons on the left" (separate, non-overlapping phrases)
- "red apple" and "blue bowl" (completely distinct text regions)
❌ Invalid:
- Highlighting "black FPGA chip" and then trying to highlight "FPGA chip in the center" (overlapping words)
- Highlighting "red apple" and then highlighting "apple" again (duplicate highlight of same word)
Best practice: Write your caption with clearly separated descriptive phrases for each object you plan to annotate.
One phrase per box:
Each bounding box should link to exactly one phrase in the caption. Break complex descriptions into multiple linked annotations if needed.
✅ Good:
- Phrase: "large black FPGA chip" → Box: around the FPGA chip
- Phrase: "row of gold pin headers" → Box: around the pin headers
- Phrase: "7-segment LED display" → Box: around the LED display
❌ Too complex:
- Phrase: "large black FPGA chip with pin headers and an LED display" → Multiple boxes
- Better: Split into three separate phrase-box pairs
Match phrase specificity to box:
- If your phrase mentions color, size, or location, ensure these are accurate for the box
- Don't use generic phrases like "object" or "thing" unless unavoidable
- Include distinguishing features that help identify the specific object
Link all key objects:
- Annotate all prominent objects in the image
- Don't leave obvious objects without phrase-box links
- For complex scenes, prioritize the most important 5-10 objects
Balance detail with practicality:
- For simple scenes: Link most visible objects (5-8 phrase-box pairs)
- For complex scenes: Focus on key objects and representative examples (8-12 pairs)
- Avoid exhaustive annotation of every tiny detail
How many annotations per image?Minimum: 3-5 phrase-box pairs per image
Recommended: 5-10 phrase-box pairs per image
Complex scenes: 8-15 phrase-box pairs per image
More annotations = better model understanding, but quality matters more than quantity.
Troubleshooting
Common issues and solutions when creating phrase grounding annotations.
My annotations aren't saving
Possible causes and solutions:
-
Network connectivity — Check your internet connection. Annotations require an active connection to save.
-
Session timeout — If you've been idle, refresh the page and reopen the annotator.
-
Browser issues — Clear cache or try a different browser. Supported browsers: Chrome, Firefox, Safari, Edge.
-
Incomplete annotation — Ensure boxes are properly linked to phrases. Unlinked boxes may not save correctly.
Verify your annotations saved:
- Check your dataset Explorer Annotations tab for statistics
- Review the bottom thumbnail strip in the annotator for "Annotated" badges
I can't draw bounding boxes
Solution steps:
-
Activate Rectangle tool — Press R or click the Rectangle tool icon
-
Check tool mode — If another tool is active (H, T, D), press Esc to exit, then press R
-
Zoom level — If the image is too zoomed in/out, adjust zoom to see the area clearly
-
Browser permissions — Ensure your browser allows drawing on canvas elements
The interface is slow or lagging
Performance optimization:
-
Large images — Images over 10 MB may load slowly. Upload optimized images when possible.
-
Many annotations — Images with 20+ boxes may be slower. Consider splitting complex scenes across multiple images.
-
Browser resources — Close unnecessary tabs and applications.
-
Use keyboard shortcuts — Keyboard navigation is faster than mouse clicks.
How do I unlink a phrase from a box?
Solution:
-
Press D or click the Delete tool
-
Click on the highlighted phrase in the caption (not the box)
-
The phrase highlight and link are removed, but the bounding box remains
-
You can now highlight a different phrase to link to that box
Alternatively, delete the box and redraw it linked to the correct phrase.
IntelliScribe isn't working
Common issues:
-
IntelliScribe Caption (C) — Works on any image. If it fails, check your internet connection.
-
IntelliScribe Phrases (P) — Requires:
- At least one bounding box drawn
- A caption with text
- Refresh the page if it still doesn't work
I accidentally deleted annotations
Unfortunately, deletions cannot be undone. Best practices to prevent this:
-
Be careful with Delete tool — Press D intentionally, not by accident
-
Exit Delete mode — Press Esc after deleting to prevent accidental deletions
-
Export backups — Regularly download your dataset as a backup
-
Review before navigating — Check your work before pressing E to move to the next image
Common questions
Should I write captions before or after drawing boxes?
Both approaches work:
Caption first (recommended for beginners):
- Write complete caption describing all objects
- Highlight phrases systematically
- Draw boxes for each highlighted phrase
- More organized and less likely to miss objects
Boxes first (faster for experienced annotators):
- Identify objects visually
- Draw boxes quickly
- Link to phrases in caption
- Use IntelliScribe Phrases to auto-highlight
Choose based on your preference and workflow. See Link phrases to bounding boxes for both workflows.
How detailed should my captions be?
Balance detail with practicality:
Include:
- Main objects and their attributes (color, size, shape)
- Spatial relationships and positions
- Distinguishing features
- Counts when relevant ("three apples", "several buttons")
Avoid:
- Excessive detail about unimportant elements
- Subjective opinions ("beautiful", "interesting")
- Information not visible in the image
- Redundant descriptions
Good length: 10-30 words for simple scenes, 20-50 words for complex scenes
See Caption writing guidelines for examples.
Can I annotate the same object multiple times?
Generally no, but there are exceptions:
Standard practice:
- Each object gets one bounding box
- Each box links to one phrase
- No duplicate boxes on the same object
Exceptions:
- Object has multiple distinct parts worth annotating separately
- Object appears in different contexts requiring different descriptions
- Dataset requires multiple annotation styles for comparison
Be consistent with your approach across the entire dataset.
What if objects overlap?
Draw separate boxes for each object:
- Draw a box around the first object (even if partially occluded)
- Draw a box around the second object
- Boxes can overlap in the interface
- Link each box to its own phrase in the caption
Example:
- Caption: "A red apple behind a blue bowl on the left, a green apple visible in the bowl"
- Box 1: Around visible part of red apple → "red apple behind a blue bowl"
- Box 2: Around blue bowl → "blue bowl on the left"
- Box 3: Around green apple → "green apple visible in the bowl"
Can I annotate images collaboratively?
Yes! Multiple team members can annotate different images in the same dataset:
- Add team members to your organization
- Assign different images to different annotators
- Create annotation guidelines based on this documentation
- Reference Annotation guidelines for consistency
Pro tip: Create a style guide for your team covering:
- Vocabulary and terminology to use
- How tight to draw boxes
- How detailed captions should be
- Which objects to prioritize
Can I import existing phrase grounding annotations?
Yes! You can upload pre-existing phrase grounding annotations:
- Upload phrase grounding annotations in supported formats
- This is useful if you have annotations from other tools or datasets
- You can then edit these annotations in the annotator
After importing, check your dataset Explorer to verify your uploaded annotations.
Should I use IntelliScribe or annotate manually?
Use IntelliScribe to speed up annotation, but always review:
IntelliScribe strengths:
- Fast caption generation
- Good for common objects
- Useful for getting started quickly
- Helpful for large datasets
When to annotate manually:
- Domain-specific objects
- Precise terminology required
- Complex relationships between objects
- Quality over speed
Best approach: Combine both:
- Use IntelliScribe Caption (press C) to generate initial caption
- Edit caption manually (press T) to add domain-specific terms
- Draw boxes manually (press R) for precision
- Use IntelliScribe Phrases (press P) to auto-link phrases
- Review and adjust links as needed
Annotation best practices
Follow these guidelines to create high-quality phrase grounding annotations that improve model performance.
Consistency is key
- Use the same terminology for similar objects across images
- Draw boxes at consistent tightness across your dataset
- Follow the same caption writing guidelines for all images
- Create a style guide if annotating collaboratively
Quality over quantity
- Accurate boxes are more valuable than many imprecise ones
- Take time to write descriptive captions
- Review and edit annotations when you spot errors
- Check the bottom thumbnail strip to review which images have been annotated
Diverse coverage
- Annotate objects at different scales (small, medium, large)
- Include objects in different positions and contexts
- Cover different lighting conditions and angles
- Include partially visible objects when relevant
Efficient workflow
- Learn keyboard shortcuts to speed up annotation
- Choose a workflow (caption-first vs. box-first) and stick with it
- Use IntelliScribe to speed up initial annotation
- Monitor your progress through the dataset Explorer Annotations tab
- Take breaks to maintain annotation quality
What's next?
Annotations complete!Your phrase grounding annotations are ready for training. Your model will learn to understand the connection between text descriptions and visual objects.
Review Annotation best practices to ensure your dataset is optimized for training.
Next steps
Use your annotations to fine-tune a vision-language model
Import existing phrase grounding annotations
Understand how phrase grounding works and best practices
Learn more about IntelliScribe features
Related resources
- Annotate for VQA — Visual question answering annotations
- Upload annotations — Import existing phrase grounding annotations
- Phrase grounding concepts — Deep dive into phrase grounding
- View dataset insights — Analyze your annotation quality
- Manage datasets — Organize and maintain your datasets
- AI-assisted tools — Learn about IntelliScribe features
- Add team members — Collaborate on annotation projects
Need help?
We're here to support your VLMOps journey. Reach out through any of these channels:
Updated 3 months ago